Introduction
A functional training zone is one of the most flexible areas in a commercial gym, and one of the easiest to plan badly. It may need to support small-group classes, personal training, warm-ups, open-gym strength work and conditioning circuits in the same day. The products are familiar—rigs, sleds, ropes, wall balls, kettlebells, dumbbells and storage—but the operational details determine whether the zone feels professional or chaotic.
This guide gives commercial gym owners, distributors and project teams a process for selecting functional training zone equipment, setting a layout brief and preparing for installation. It is not a substitute for local building, safety or installation requirements. Final drawings, fixing methods and product specifications must be reviewed for the selected equipment and site.
Start with the training behaviour, not the empty room
Before measuring a room, list the ways it will be used. A functional zone can support very different operations:
- A coach-led circuit for a small group.
- Personal-training sessions that need a rig and portable weights.
- Independent members using a sled lane or training ropes.
- Athletic preparation involving carries, loaded movement and conditioning.
- A flexible event or assessment space.
For each use, note the maximum number of users, the path between stations, the equipment that must remain fixed and the tools that can be moved. Then walk the proposed route physically in the space if possible. A layout that looks efficient in a render may fail when a loaded sled returns through a route used by members carrying kettlebells.
The resulting brief should state who uses the area, what they do there, and what must never be obstructed. This becomes the reference for the equipment list and supplier conversations.
The core equipment categories
Functional training rig
A rig is often the anchor of the zone. It can support pull-up work, attachment-based training, storage integration and a visual boundary for the area. Its value depends on correct configuration and installation. The buyer should establish whether the rig is floor-fixed, wall-fixed or free-standing; whether the site structure is appropriate; where the clear training zone begins; and how it will be assembled after delivery.
Ask for a final configuration drawing showing post positions, overall height, fixing points, attachment locations and any required clearances. If the project uses bespoke branding or a non-standard configuration, confirm those details in the drawing and order description. Do not rely on a product image for a fixed structural item.
For a product-specific starting point, review the current pull-up bars and stations before asking for configuration details.
Sled and lane
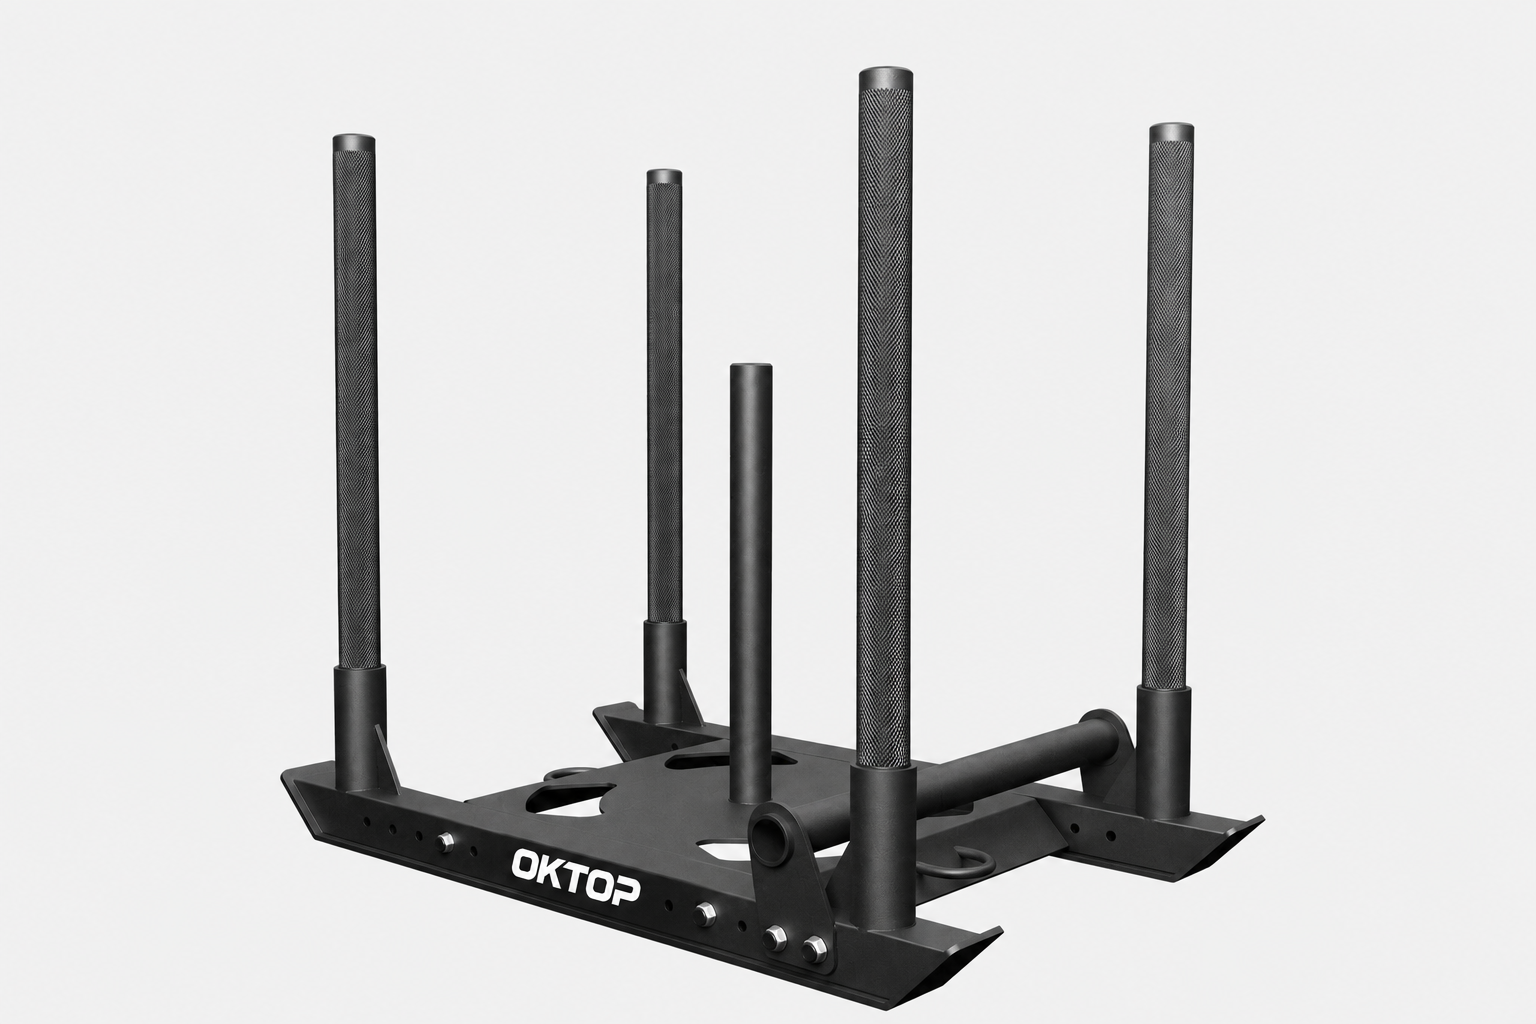
A sled can turn a simple floor strip into a strong conditioning station, but only when the lane is designed for it. Define the start point, end point, turning area, storage position and walking route around the lane. Confirm the appropriate floor surface with the product supplier and flooring contractor. The right answer depends on the sled design and the floor system, so it should be documented rather than assumed.
The lane also needs operating rules: whether it is used during open-gym hours, how plates are stored, where members wait and how the equipment is returned. These details protect the rest of the gym’s circulation.
Wall target and wall balls
Target-based work adds a clear skill and conditioning station. However, the target height, wall construction, impact area and recovery space must be reviewed together. Wall balls should be stored where users can select a suitable weight without walking across an active lane. Include durable identification and a cleaning routine in the operations plan.
Training ropes
Training ropes need robust anchor planning and open working space. Confirm the anchor design, rope length, handling area and storage method. If the zone is shared, mark the active rope area clearly so members do not cross it during a session.
Portable loaded tools and storage
Kettlebells, dumbbells, sandbags and weight plates allow a coach to scale sessions without changing the structure of the room. They also create the greatest reset burden if storage is inadequate. Specify storage as part of the equipment package, not an afterthought.
Choose weight increments based on the actual programme and member profile. Arrange storage by product type and logical progression. The aim is simple: a user should select, use and return a tool without crossing a sled lane, passing beneath a rig station or blocking a coach’s sightline.
A practical layout sequence
1. Mark fixed infrastructure first
Place the rig, wall target, doors, columns, service panels and any immovable elements on a scaled plan. Add required access routes and emergency paths as determined by the local project team.
2. Draw operating zones, not product rectangles
A product footprint is only the space it occupies when stationary. Add the user’s movement, mounting/dismounting space, handles, pull path, sled lane and cleaning access. This is the point where a compact-looking design becomes an operational layout.
3. Create storage and reset points
Storage should be close enough to the station to keep transitions short, but outside the active movement area. A consistent return point also supports cleaner maintenance checks and faster coached classes.
4. Run a class simulation
Use the intended maximum group size. Assign people to each station and simulate a rotation. Ask: Can everyone see the coach? Do two return paths cross? Can an equipment change happen without a user waiting inside another station? Revise the layout before the order is final.
5. Confirm the delivery and installation route
Measure access from the unloading point to the installation area, including lifts, turns, doors and stairs. Record site restrictions and planned installation dates. This is particularly important for steel rigs, long rails and bulky packaged items.
Installation preparation checklist
Installation preparation should begin before production is complete, not after shipment arrives. A project file should include:
- Final approved equipment list and configuration drawings.
- Site dimensions, ceiling heights and verified floor or wall conditions.
- The agreed fixing method and any local approvals required.
- Flooring scope and completion date.
- Delivery address, unloading method and route to the room.
- Installation-team responsibilities, tools and site access arrangements.
- Assembly instructions, parts lists and hardware list.
- A handover checklist for visual inspection, fastener review and user orientation.
For a manufacturer or supplier, these inputs make it easier to identify risks early. For the buyer, they create a record that can be shared between procurement, contractor, operations and coaching teams.
How to write a better RFQ for a functional zone
An effective request for quotation explains the project rather than simply asking for “functional equipment prices.” Include the target country, facility type, available dimensions, intended users, desired opening date, product quantities or requested recommendation, branding needs, delivery terms and installation scope.
If a drawing is not available, provide photos, a measured sketch and ceiling height. If a rig is involved, say whether floor or wall fixing is possible and which information still requires verification. A transparent RFQ lets the supplier state assumptions clearly; it is safer than receiving a low price based on unstated conditions.
Ask for the quotation to separate products, accessories, optional items, packing information and any installation-related scope. That makes comparison possible when multiple suppliers are considered.
Factory testing and shipment inspection
For fixed and functional equipment, use inspection steps that correspond to what was ordered. Before shipment, a buyer may request confirmation of the selected finish, labels, core dimensions where practical, hardware bags, attachment count and packaging labels. For assemblies, request a reference photo or video that demonstrates the intended configuration—not a vague claim that all products have been tested.
At shipment, reconcile the packing list with the purchase order. Check that long components, loose fittings, targets, rope anchors and accessories are separately identifiable. On arrival, inspect cartons for transport damage before assembly and retain records for any discrepancy. After installation, follow the product instructions for a final fastener and stability review, then have coaches orient members to the zone before unrestricted use.
Product application: three sample zone concepts
Compact coached studio
Use a limited rig configuration, defined sled lane, wall-ball station, a compact storage wall and selected portable weights. The emphasis is on controlled rotations, fast setup and coach visibility.
Commercial club functional zone
Create a larger central rig area with separate sled, rope and target stations around the perimeter. Keep circulation routes open and designate storage by zone. This supports coached blocks and independent members without making every product compete for the same floor space.
Performance and team-training area
Prioritise flexible lanes, robust storage, group visibility and the ability to reconfigure portable tools. Involve the coaching staff when setting target heights, loading options and the station sequence because programming requirements drive the best layout.
Common project mistakes
Treating the rig as furniture
A rig is an installation item. Its fixing method, site structure, clearance and final configuration must be reviewed early.
Forgetting return routes
Sleds, sandbags and plates need a return path. If that path crosses an active training lane, the room will become less safe and less efficient.
Leaving storage out of the quotation
Loose tools without storage create longer class transitions, more maintenance exposure and a less credible customer experience.
Mixing installation assumptions into product prices
Separate product supply, delivery, local installation and any site works so project responsibilities remain clear.
FAQ
What equipment should a commercial functional training zone include?
Most zones include a rig or anchor infrastructure, portable loaded tools, storage and selected conditioning stations such as a sled, training ropes or a wall target. The correct mix depends on the facility’s programme, users and footprint.
How much space does a functional training zone need?
There is no single reliable area figure because operating clearance, product configuration, class size and circulation determine the usable space. Build a scaled layout around the final equipment drawings and the intended class simulation.
Does a functional rig need professional installation?
Installation needs depend on the rig and site. The buyer should review the selected product’s instructions, fixing method and local requirements with a qualified installation or project team before proceeding.
What should be inspected before equipment shipment?
Confirm models, finish, labels, quantities, accessory and hardware lists, configuration reference and packing labels against the purchase order. For complex installations, make sure assembly references are available to the receiving team.
Conclusion
A commercial functional training zone succeeds when equipment, circulation, storage and installation preparation are planned as one system. Begin with training behaviour, use final product documents to develop the layout, and communicate site requirements before the purchase order is released. That approach makes the zone easier to coach, operate and maintain after opening day.
CTA: Start your functional-zone equipment brief
Share your floor plan, facility type and product requirements. Explore OKTOP Hybrid Training Equipment or contact us for a commercial functional training equipment discussion.